Getting started with .Net (Core) 5 and ASP.NET Core Identity
In a multi-part series, we'll start building a .NET 5 MVC Web App. Stay tuned for part 2.
Welcome to part 1 of a multi part series where we will be building a .NET 5 MVC Web App that will allow users to manage their photo collection. The first installment will be all about getting a basic skeleton of a web site up and running using ASP.NET Core Identity and Entity Framework. Future installments will build on this functionality to allow uploading of photos, and implementing some features to assist with organization such as rating, tags, etc.
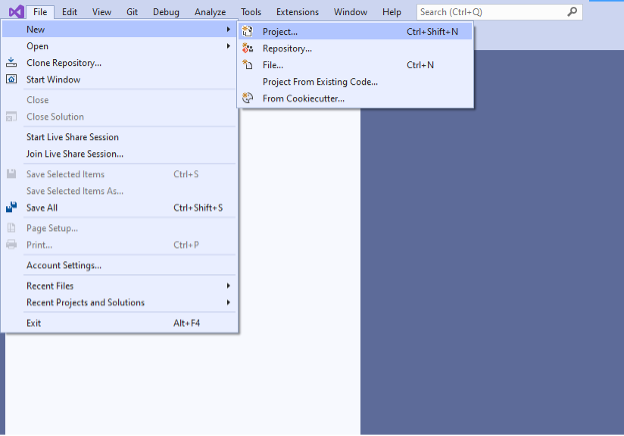
First, we’ll need to open Visual Studio, and add a new project. From the File menu, click New -> Project
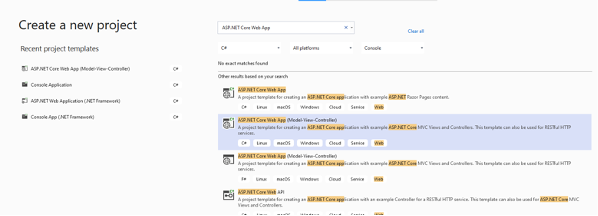
The project template we’ll be using is “ASP.NET Core Web App (Model-View-Controller).
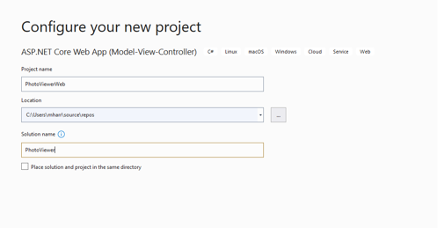
After choosing the project template, you’ll be asked to provide a name for your Project. We will be naming our project “PhotoViewerWeb”. You can name your project whatever you choose, however picking the same name may make it easier to follow along. After choosing a name and location for your project, click “Next” to move on to the next step.
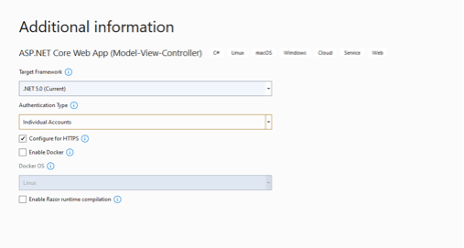
The next screen will allow you to select a Target Framework and an Authentication Type. Choose .NET 5.0 for the Target Framework, and “Individual Accounts” for the Authentication Type, and then click “Create”.
You should now have a working project/solution with quite a few files auto generated for you.
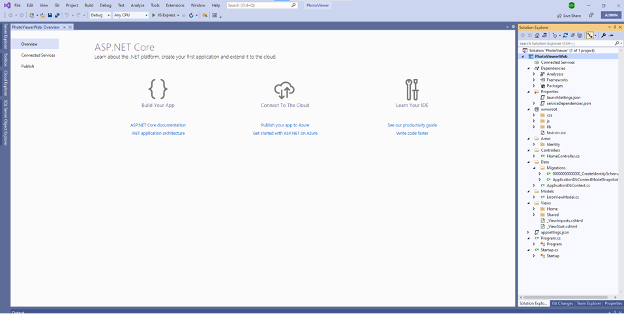
This should compile and be runnable out of the box. Go ahead and run the project by choosing Debug -> Start Debugging, or just hit the F5 key. You should see a page that looks like this:
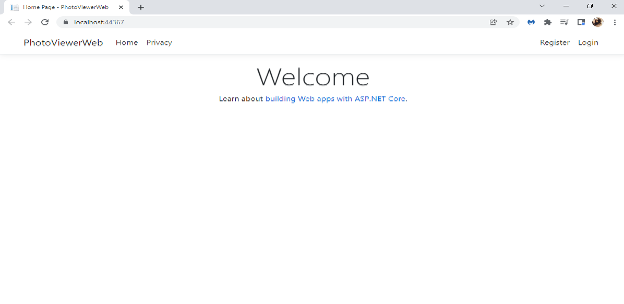
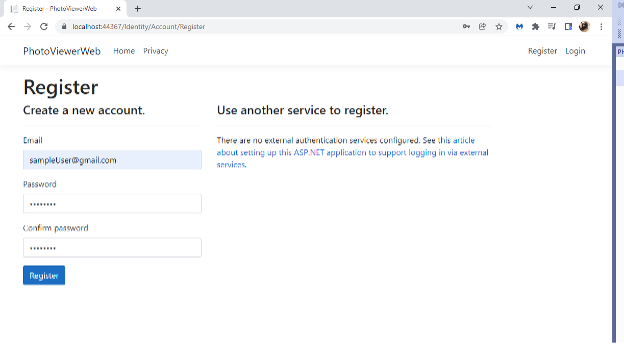
The base functionality includes a simple top navigation layout with a few canned pages and a working Register and Login workflow. Click the “Register” link and fill out the required fields.
When you click Register, you should see an error page like this:
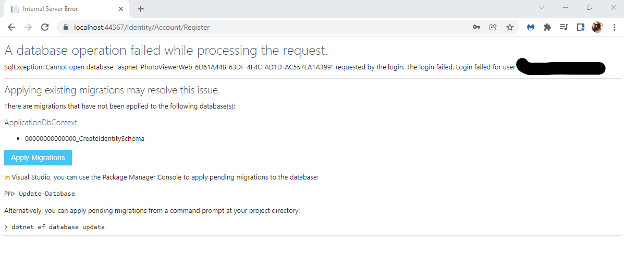
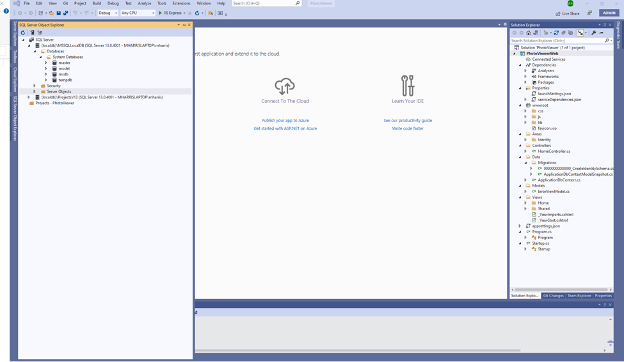
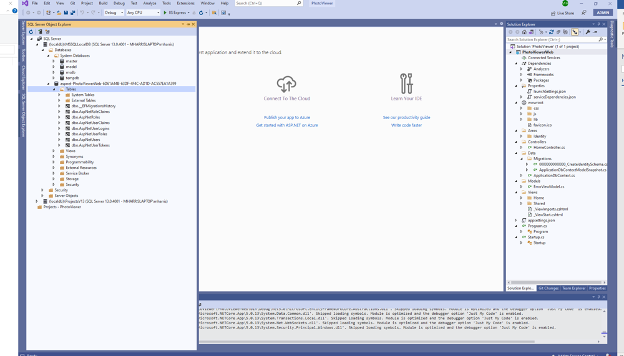
This is nothing to be alarmed about. This is just telling us that the database where we will be storing our data has not yet been created. The error provides instructions for fixing the issue. You can click the blue button that says “Apply Migrations”, or, you can run the command Update-Database from the Nuget Package Manager Console. Doing so will create a database in the localdb and create the tables necessary to support Identity.
Before:
After:
Once the Database has been created, you should see the following screen after registering a new user:
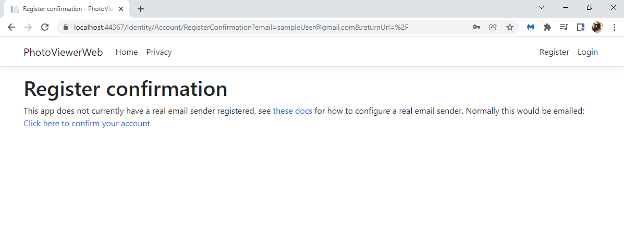
In a real-world application, you would want to configure the application to actually send a confirmation email. For the purposes of this walk through, we’ll just click the provided link to confirm your account and skip the email confirmation step.
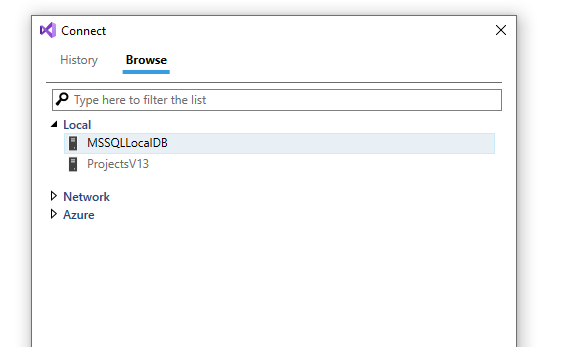
You can confirm that a user was created and saved to the Database by querying the AspNetUsers table. From the Visual Studio menu, select Tools -> SQL Server -> New Query, and select your local SQL Server instance (In my case, this would be Local -> MSSQLLocalDB).
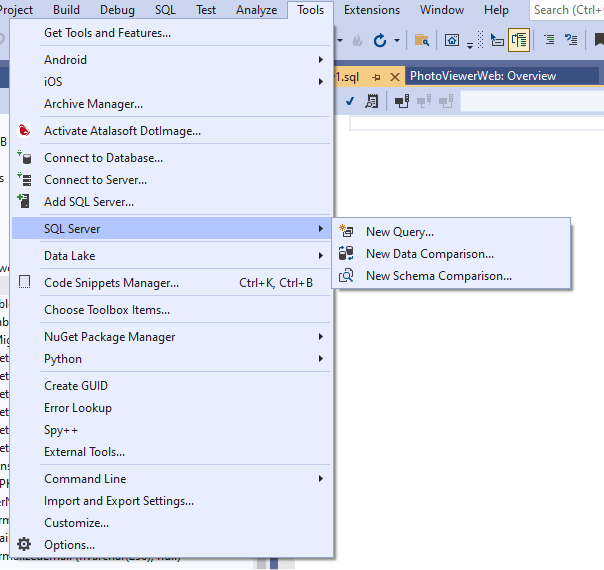
This will open a query editor window. Choose the database for this project from the db selection box,
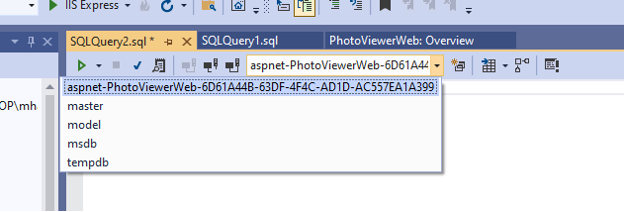
and query the AspNetUsers table with the following block of SQL.
select * from dbo.AspNetUsersThe shortcut to execute your query is Ctrl-Shift-E. Running the query should show 1 entry in the AspNetUsers table, which should correspond to the user that you registered.

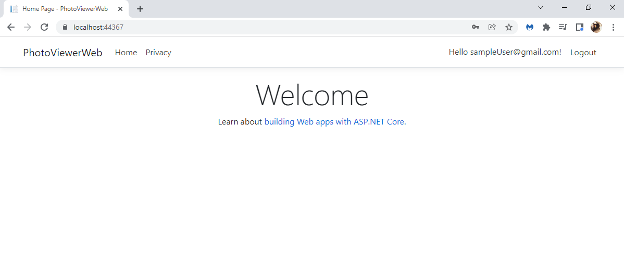
Now, you can click the login link in the top right of the screen and enter the credentials that you just registered. You should be taken to the home page, and your username should show in the top right of the screen. Clicking the logout button should then log you out.
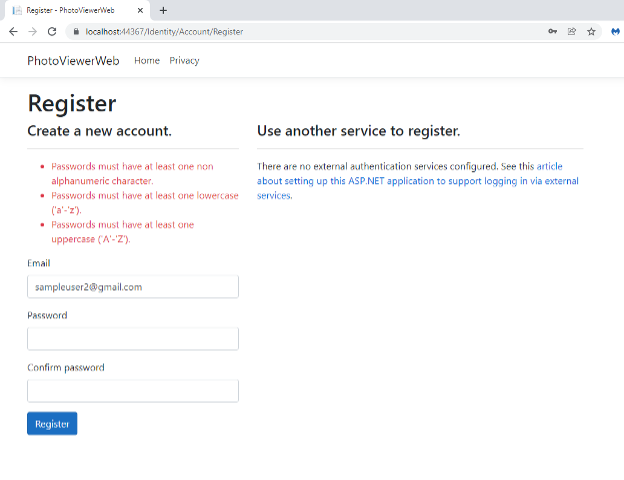
The default password requirements are pretty basic and should be customized for your application. By default, the password must be 6 characters long, have at least one non alphanumeric character, at least one lowercase character, and at least one uppercase character.
To customize this behavior, you need to configure the IdentityOptions in the startup.cs file. Modify the ConfigureServices method in startup.cs to look like this:
public void ConfigureServices(IServiceCollection services)
        {
            services.AddDbContext<ApplicationDbContext>(options =>
                options.UseSqlServer(
                    Configuration.GetConnectionString("DefaultConnection")));
            services.AddDatabaseDeveloperPageExceptionFilter();

            services.Configure<IdentityOptions>(options =>
            {
                // Password settings.
                options.Password.RequireDigit = true;
                options.Password.RequireLowercase = true;
                options.Password.RequireNonAlphanumeric = true;
                options.Password.RequireUppercase = true;
                options.Password.RequiredLength = 10;
                options.Password.RequiredUniqueChars = 1;

                // Lockout settings.
                options.Lockout.DefaultLockoutTimeSpan = TimeSpan.FromMinutes(5);
                options.Lockout.MaxFailedAccessAttempts = 5;
                options.Lockout.AllowedForNewUsers = true;

                // User settings.
                options.User.AllowedUserNameCharacters =
                "abcdefghijklmnopqrstuvwxyzABCDEFGHIJKLMNOPQRSTUVWXYZ0123456789-._@+";
                options.User.RequireUniqueEmail = false;
            });
            services.ConfigureApplicationCookie(options =>
            {
                options.Cookie.HttpOnly = true;
                options.LoginPath = "/Identity/Account/Login";
                options.AccessDeniedPath = "/Identity/Account/AccessDenied";
                options.SlidingExpiration = true;
            });


            services.AddDefaultIdentity<IdentityUser>(options => options.SignIn.RequireConfirmedAccount = true)
                .AddEntityFrameworkStores<ApplicationDbContext>();
            services.AddControllersWithViews();
        }
To confirm that Identity and Authorization are working, we can now tag the Privacy page with an [Authorize] attribute to force the user to be logged in to access the Privacy page.
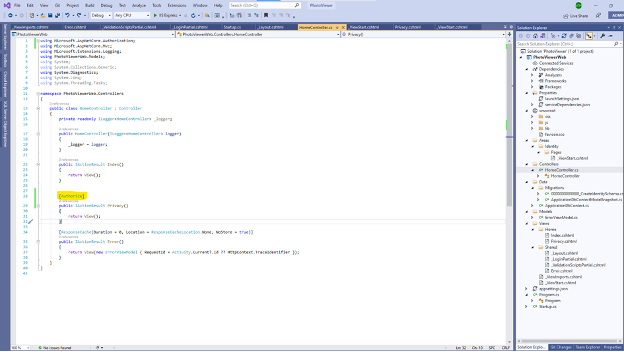
Now, run the application again, and click on the Privacy page link. You should now be redirected to the login page. After you enter your credentials, you will then be taken to the Privacy page.
This concludes the first installment of this series. For more information about what is going on behind the scenes, check out the Microsoft documentation here: https://docs.microsoft.com/en-us/aspnet/core/security/authentication/identity?view=aspnetcore-5.0&tabs=visual-studio. Thanks for following along, and I hope you found this walkthrough helpful!
References:

The JBS Quick Launch Lab
Free Qualified Assessment
Quantify what it will take to implement your next big idea!
Our assessment session will deliver tangible timelines, costs, high-level requirements, and recommend architectures that will work best. Let JBS prove to you and your team why over 24 years of experience matters.


